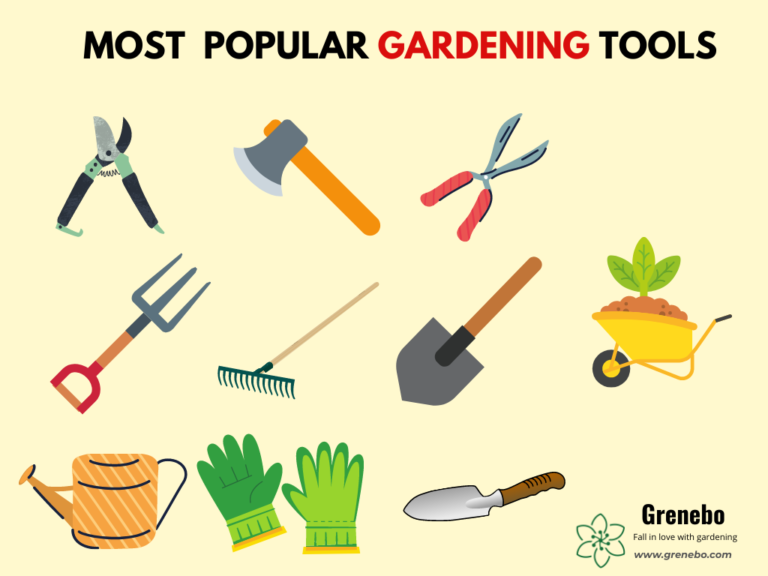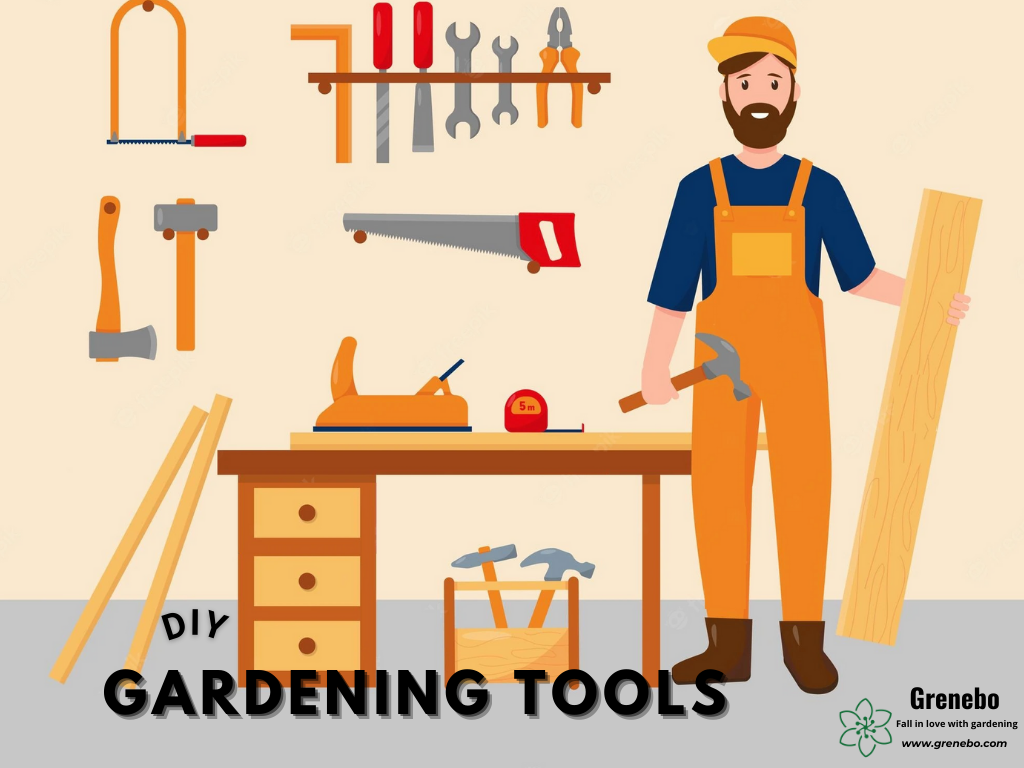
Do It Yourself: Gardening Tools
With the rise of home gardening, it is no wonder that DIY gardening tools are becoming more popular. gardening is more than just a hobby, it can also be a way to save money on food. As more people learn about the benefits of having their garden, they are starting to invest in tools that make the process easier.
Is DIY Gardening Tools a Norm?
DIY gardening tools are the norm. We’ve seen this trend grow in popularity over the last decade. Gardening has been a hobby for many years and people have always been looking for ways to make their jobs easier and more efficient. With the rise of technology, there are more options than ever before when it comes to DIY gardening tools.
There are several do-it-yourself (DIY) gardening tools every gardener must-have. And yes, these are different from the ones you see in home improvement stores. While many people think that gardening is easy and do-it-yourself tools won’t help them very much in it, I want to show you how DIY can make your gardening experience more fun and easier than you could have ever thought possible.
DIY gardening tools can be a lot cheaper than buying the real thing that you might end up using once. These tools are easy to make yourself, and if you can follow simple instructions, anyone with a drill can build their own. In this article, we’ll give our best to show how to make: garden forks, pots, watering cans, rakes, and more.
DIY Gardening Tool Advantages
Cost-effective
DIY gardening tools are cost-effective, and you do not have to spend a fortune on them. You can make all your DIY gardening tools yourself at home using simple materials such as wood and metal. This is a great advantage for people who do not have enough cash to buy expensive tools for their garden.
Design is solely yours
The best part about DIY gardening tools is that they give you freedom of choice and design since you are the one who makes them. You can choose any material you like from wood, metal, or plastic, depending on your preference and budget. You can also decide how big or small you want your DIY gardening tool to be as well as what shape it should have; whether it should be rectangular or square or even round!
Unlimited Customization
The best thing about making DIY gardening tools is that you have unlimited customization options. You can create any type of tool that fits your needs and preferences. If you don’t like the way a certain tool works, then you can always change it to suit your needs better.
You get exactly what you want; this means that if you have an idea in mind about what kind of tool would work perfectly with your needs, then go ahead and make it yourself!
How to Prepare it
We prepared five of them. Check it out!
Watering Can (DIY)
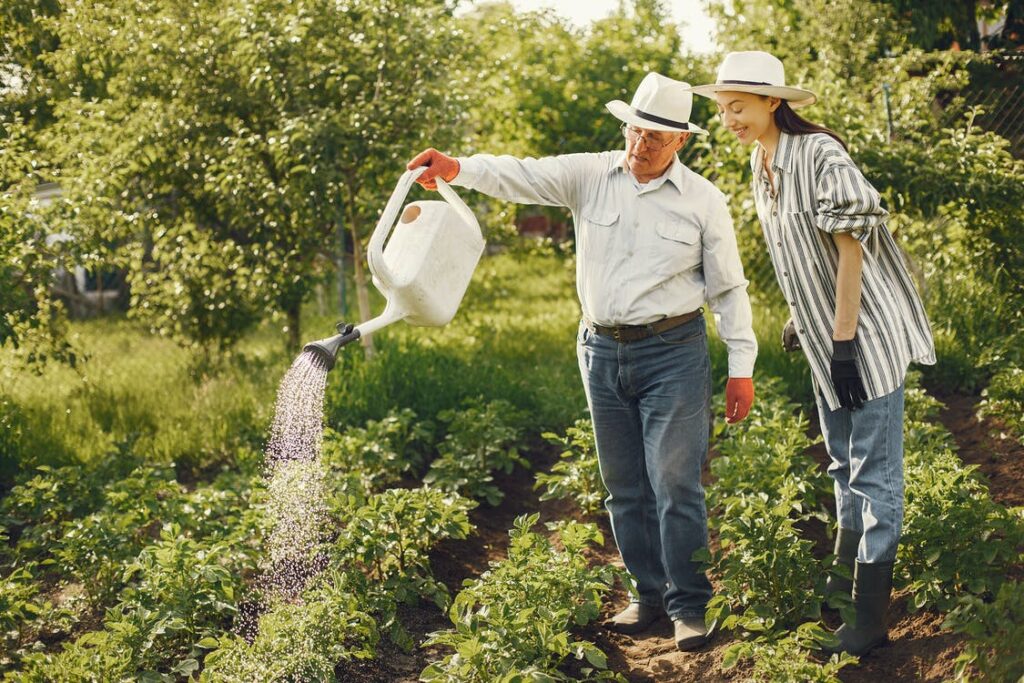
Watering your plants is crucial to their development. It aids in the absorption of nutrients, maintains them hydrated so they can photosynthesize, and keeps them clean. A watering can is a useful item for quickly and efficiently watering your lawn or garden, eliminating the need to transport buckets or jugs of water.
Gone are the days of hauling a heavy watering can about. A two-liter bottle and some plastic piping are all you’ll need.
Cut the bottom off the two-liter bottle first. After that, drill holes in the cap.
Using plastic pipe connectors, attach one end of the plastic piping to the cap and the other end to the bottom of the bottle. The water can now flow in both directions. You’re ready to go once you’ve filled up your new watering can!
Homemade Garden Fork
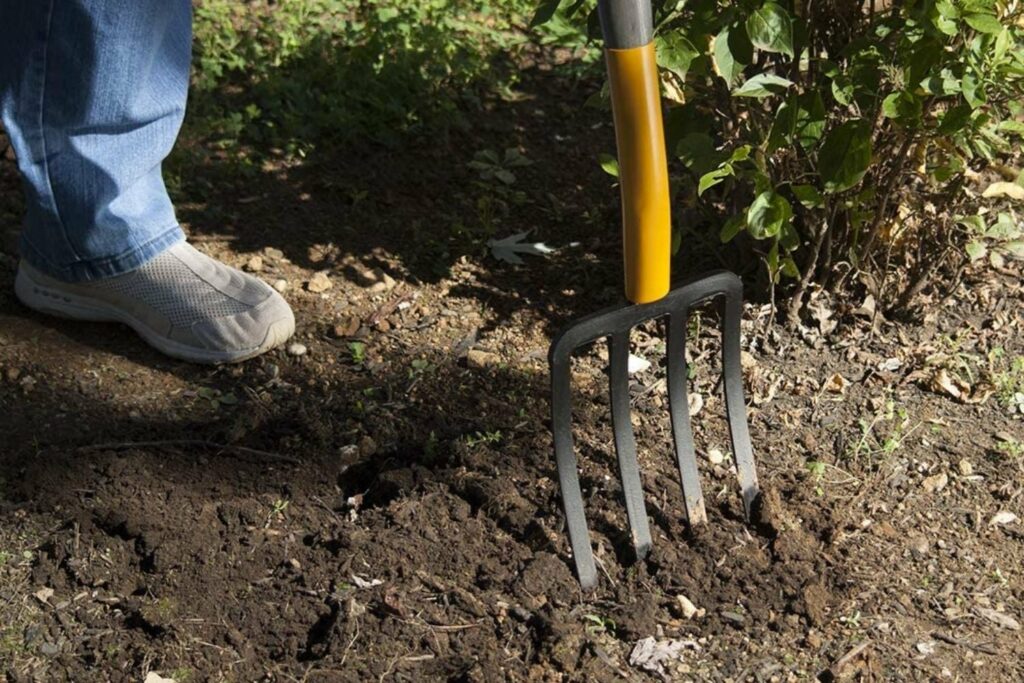
A garden fork is an excellent tool for keeping your plants healthy and happy. It simplifies several gardening activities, including shifting compost and mulch, aerating soil, and breaking up huge clumps of earth. This multifunctional tool can be used instead of a shovel or spade because it is less risky and performs just as well.
Simply follow these few steps:
1. Cut a 12-inch piece of wood from the 1.25″ dowel. This is the grip.
2. From the 1/4″ dowel, cut three 6″ pieces of wood. The prongs are as follows.
3. Locate the center of all four pieces (handle and prongs).
4. Using a 3/16″ bit, drill four holes, one through each component at these spots, with a depth of 1/2″.
5. Glue all of the prongs into the handle’s holes, forming a triangle with equal sides (an equilateral triangle). Allow 24 hours for drying.
6. Apply glue around the outer edge of each hole then 12 tacks around each hole after it’s dry, locking all the prongs in place.
Do It Yourself, Rake
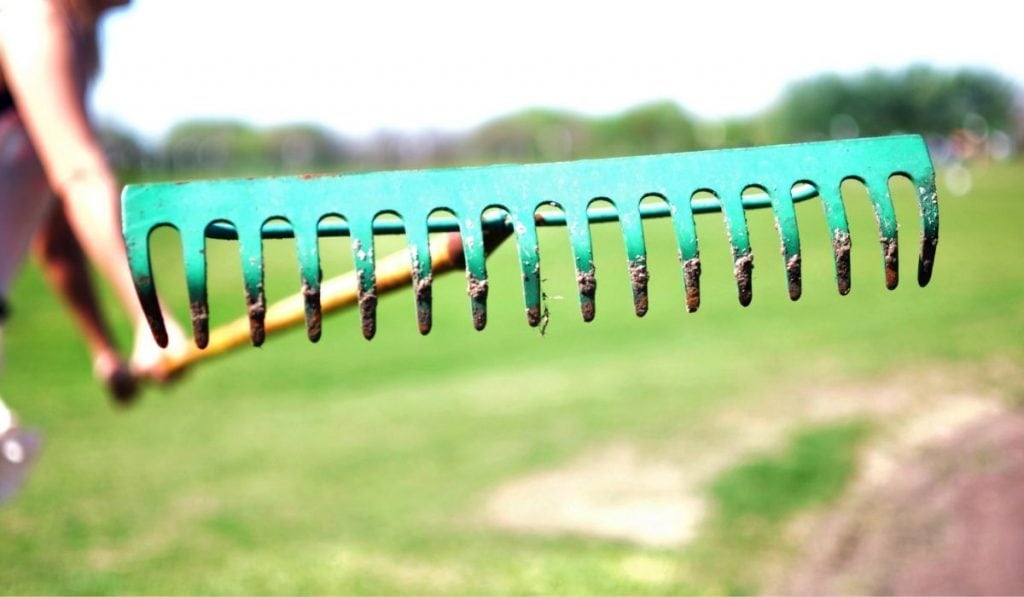
Raking is the most common application for a rake. A garden rake’s teeth are closely spaced and designed to collect trash into heaps and smooth soil while leveling it. Although some rakes have varied-sized teeth for different activities, a garden rake, in general, has small teeth that can be used for small projects or general cleanup.
Here’s how to create your rake, step by step:
Collecting materials is the first step
The following tools are required: a hoe, a shovel, and a rake head. The hoe is a stick that has a sharp blade on one end. This will be your handle. The blade of your shovel will become the teeth of your rake head. Finally, you’ll need a rake head to attach to the shovel’s handle so that it can be used as a regular rake.
TIP: For all of the items you’ll need to create your DIY rake, go to your local hardware or gardening store. You don’t want your tools to fall apart on you while you’re using them, so look for ones that are still in good shape.
Attach the Rake Head to the Shovel Handle in Step 2
Duct tape and probably other methods of holding them together will be required to attach your shovel handle to your newly obtained rake head. You may have screws that slot into pre-drilled holes in both sections for easy installation, depending on the type of rake head you have. If not, there are other options, such as utilizing a mix of duct tape and rope or wire ties, and so on. Just make sure it’s well adhered to.
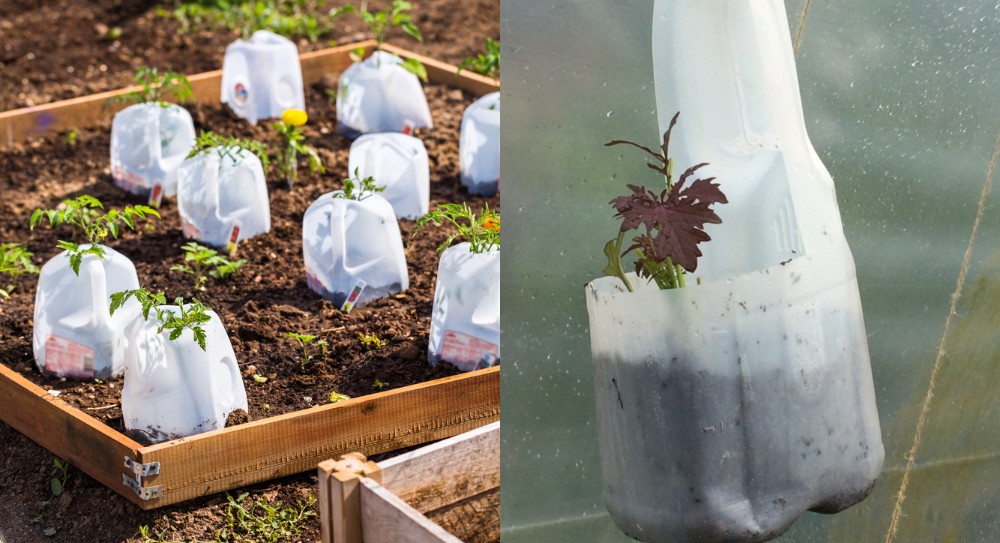
Milk Pot (DIY)
• A multi-functional scoop The scoop’s flexible plastic makes it easy to maneuver in confined spaces, making it excellent for fertilizer and potting soil applications. Start at the handle of the milk jug and cut horizontally up each side from there to make this scoop. Then, cut forward-slanting diagonal slashes on the other two sides until the bottom half of the jug is gone. If you keep the cap on, you’ll get a scoop!
• Flats for storing seeds. Growing flowers or vegetables from seed is a great way to save money in the garden, but it’s all too easy to waste those savings on gardening supplies. Seed flats can be purchased or rinsed and preserved milk jars can be used.
• You can build your greenhouse. In the spring, new seedlings are delicate, and a late frost can spell disaster for your garden. Having some milk jugs on standby could rescue the day if Jack Frost makes a last-minute call. Cut the bottoms off the milk jugs and place them over the seedlings to make a mini-greenhouse to keep them warm and safe. This method, unlike using bedsheets to cover plants, will not crush delicate seedlings. Just remember to remove the milk jugs before the weather gets too hot and sunny so your plants don’t overheat.
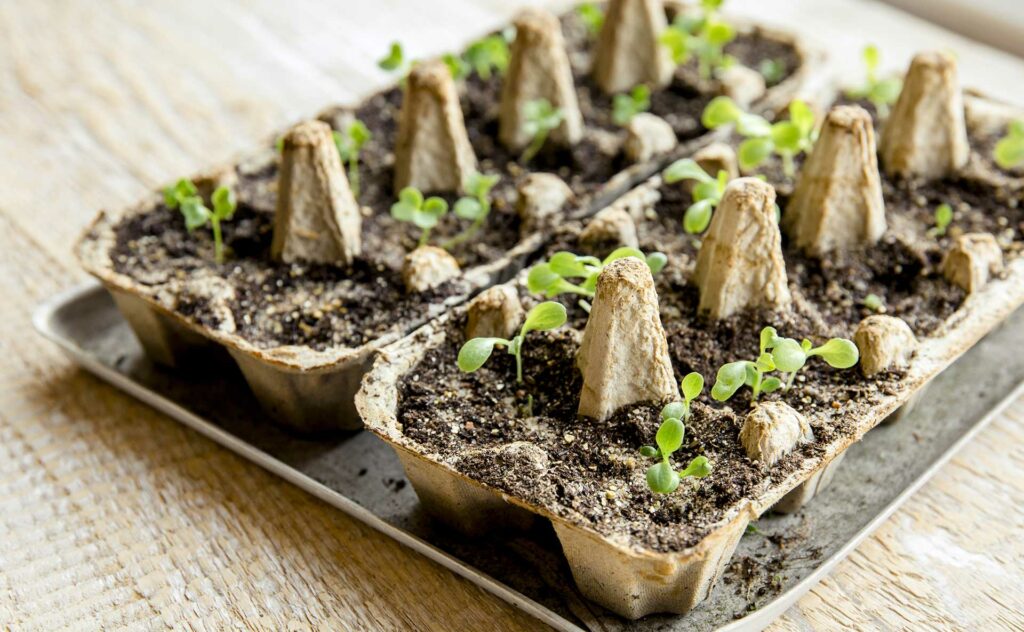
Starter Pot for Seeds
• Gather your toilet paper and paper towel roll tubes, soil, seeds, and a good pair of scissors to make a Toilet Paper Core Seed Starter Pot. Depending on how many seeds you’re planting, cut the toilet paper tube in half and the longer paper towel roll tube into four circular pieces. If you’re cutting the tube straight up, make sure you retain the shape by cutting horizontally.
Using your scissors, cut four one-inch notches on one end of the paperboard tube.
Cut four one-inch notches at one end of the paperboard tube using your scissors. Try to space the notches out such that one is on each side of the tube, north, south, west, and east. Fold the four flaps down as if you were closing a box. Now is the time to use the seed beginning pot.
Fill with potting soil, then moisten and plant the seed. Add a little amount of masking tape to the bottom for more stability if desired. Water the seed pots until the paperboard is completely saturated in a waterproof container. To construct a miniature greenhouse, cover the seed pots with a plastic bag to trap moisture until the seeds sprout.
You can plant the plants and the paperboard tube together when they’re ready to go outside. Although the tubes are biodegradable and will compost in the soil, open the bottom flaps before planting for optimum results.